Design to Conversions: Why Image Quality Directly Impacts Sales
You only get one chance to make a first impression, and on the internet, that happens in a fraction of a second. Before a visitor reads a single word of your copy, their brain has already processed your visuals. If your images are blurry, generic, or slow to load, you might lose that potential customer before you even get started.
Jeff Bullas found that articles with relevant images get 94% more total views than those without. The same logic applies to your products and services. But here is the tricky part: your images need to look amazing and load fast. It is a balancing act. High-resolution photos can slow your site down to a crawl, while fast-loading, low-quality images can make your business look unprofessional.
In this guide, you will learn exactly how to fix your website images to build trust, keep visitors engaged, and ultimately, get more people to hit that “Buy” button.
Part 1: Why Image Quality Directly Impacts Sales
We buy with our eyes. When you walk into a physical store, you can pick up a product, feel the material, and inspect the quality. Online, your photos have to do all that heavy lifting.
The Psychology of Visual Trust
High-quality photography signals professionalism. It tells the customer, “We care about the details.” If your product photos are dark or pixelated, it raises a red flag. Customers might wonder if the product itself is low quality or if the business is legitimate. In fact, 75% of online shoppers rely on product photos when deciding on a potential purchase. If they can’t see it clearly, they won’t buy it.
Balancing Quality and Performance
The most beautiful image in the world is useless if no one waits around to see it. Google found that 53% of mobile visits are abandoned if pages take longer than three seconds to load. You have to find the sweet spot where your images look crisp enough to sell but are light enough to fly.
Part 2: Types of Images That Convert
Not all images are created equal. Different parts of your site need different types of visuals to get the job done.
Hero Images
This is the big, bold image at the top of your homepage. It needs to pack a punch.
- Clear Subject: Don’t make people guess what you do. Show your product or service in action immediately.
- Strong Emotion: Use images that evoke the feeling you want your brand to convey, whether that is excitement, calm, or confidence.
- Relevance: Ensure the image speaks directly to your target audience.
Product Photography
This is where the sale happens. You need to give customers as much visual information as possible.
- Multiple Angles: Show the front, back, side, and bottom.
- Zoom Capability: Let users get up close to see textures and details.
- Lifestyle Shots: Show the product being used in real life. If you sell a backpack, show someone wearing it on a hike. This helps customers imagine owning it.
- Context: Include items for scale so customers understand the size.
People and Authenticity
Stock photos have their place, but real photos build real connections.
- Real Team Photos: Show the faces behind the brand. It makes you more relatable.
- User-Generated Content (UGC): Share photos of actual customers using your products. It acts as powerful social proof.
- Testimonial Headshots: Putting a face to a name makes a review much more believable.
Trust-Building Visuals
Sometimes the most important images aren’t photos at all.
- Badges and Certifications: Displaying security seals or industry awards builds credibility.
- Behind-the-Scenes: Show your process. If you hand-make your jewelry, show a photo of your workbench. It proves quality and craftsmanship.
Part 3: AI Tools for Picture-Perfect Results
Artificial Intelligence has made professional-looking editing accessible to everyone. You can fix common issues in seconds.
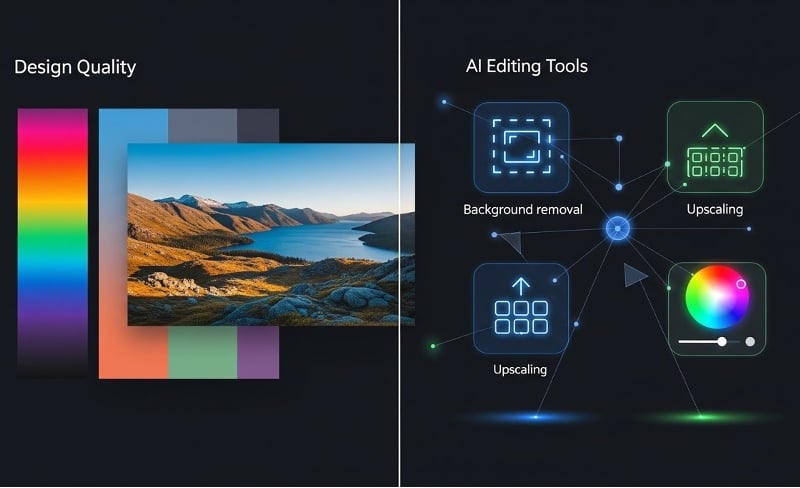
AI Background Removal
Clean product shots on a pure white background are standard for e-commerce. AI tools can instantly remove cluttered backgrounds, leaving focus entirely on your item.
- Tools: Wixel by Wix offers a great background remover that can clean up any background image in seconds.
- Use Cases: Perfect for product listings, team headshots, or creating composite images.
AI Image Upscaling
Have a great photo that is just too small or blurry? AI upscalers can add pixels and sharpen details, making a low-res image usable.
- Tools: Topaz Gigapixel, Let’s Enhance, or Upscale.media.
- When to use: Great for improving older photos in your library that you want to reuse.
AI Image Generation
Need a specific image but can’t find it on a stock site? You can create it from scratch using text prompts.
- Tools: Wixel, DALL-E, or Midjourney.
- Use for: Unique blog headers, conceptual visuals, or creative backgrounds that match your brand colors exactly.
AI Enhancement Tools
These tools act like an automatic “fix it” button. They can adjust lighting, correct colors, reduce noise, and even crop images smartly to keep the subject in the center.
Part 4: The Tech Side of Image Optimization
You don’t need to be a tech wizard to get this right, but knowing a few basics helps immensely.
Choosing the Right File Format
- JPEG: Best for photographs with lots of colors and details. It offers a good balance of quality and file size.
- PNG: Best for logos, icons, and graphics that need a transparent background.
- WebP: A modern format that provides superior compression for images on the web. It creates smaller files that look just as good as JPEGs.
- SVG: Perfect for icons and simple logos. They are scalable, meaning they look sharp on any screen size without getting pixelated.
Compression Without Quality Loss
Raw image files from a camera are huge—often 5MB or more. You never want to upload these directly to your site. You need to compress them first.
Tools like TinyPNG, Squoosh, or ImageOptim can shrink your file sizes significantly without making the image look bad to the naked eye. Aim to keep most large images under 200KB.
Proper Sizing and Resolution
Don’t make the browser do the work. If an image will only be displayed at 500 pixels wide on your site, don’t upload a 4000-pixel wide image. Resize it to the actual display size before you upload.
However, keep in mind “retina” displays (like on iPhones and MacBooks) which have higher pixel density. A good rule of thumb is to save your image at 2x the display size to ensure it looks sharp on these screens.
Lazy Loading
This is a clever technique where images only load when the user scrolls down to them. It speeds up the initial load time because the browser doesn’t have to download every single image on the page at once. Most modern platforms, including Wix, handle this automatically for you.
Part 5: Image Best Practices by Page Type
Every page has a different job, so your images need to support that specific goal.
Homepage
Your homepage is your storefront window.
- Hero Image: Use one large, high-quality image that grabs attention. Ensure it is optimized so it loads instantly.
- Storytelling: Use supporting images to visually explain what you do.
- Social Proof: Include logos of clients or media outlets where you have been featured.
Product/Service Pages
This is where customers make decisions.
- Quantity: Aim for 3-5 high-quality images per product.
- Details: Allow users to zoom in.
- Video: If possible, add a 360-degree view or a short video clip of the product in use.
Landing Pages
Focus is everything here.
- Single Hero: Use one strong image that supports your offer.
- Minimal Distractions: Avoid clutter. Every visual should point towards the Call to Action (CTA).
- Benefits: Use visuals that illustrate the benefit of your offer, not just the features.
Blog Posts
Break up walls of text to keep readers engaged.
- Featured Image: Relevant and catchy to encourage clicks.
- Visual Breaks: Add an image or graphic every 300-400 words.
- Infographics: Visualizing data makes it easier to understand and share.
Part 6: Mobile Image Optimization
With over 60% of web traffic coming from mobile devices, you cannot ignore the small screen. Mobile users are often on slower connections, so optimization is even more critical.
Mobile-Specific Strategies
- Different Sizes: Serve smaller image files to mobile devices to save data and speed up loading.
- Vertical Crops: A wide landscape photo might look great on a desktop but tiny on a phone. Consider using a portrait-oriented crop for mobile so the image fills the screen.
- Tap Targets: If an image is also a button or link, make sure it is large enough to tap easily with a thumb.
- Test It: Always check your site on an actual phone to see how the images look and load in the real world.
Part 7: Measuring the Impact
How do you know if your changes are working? You need to track the data.
Key Metrics to Track
- Page Load Time: Use tools to see if your optimization efforts are actually making your site faster.
- Bounce Rate: If people are staying on your site longer, it is a good sign your visuals are engaging them.
- Conversion Rate: The ultimate metric. Are more people buying or signing up?
- Engagement: Are people clicking on your product galleries or zooming in on photos?
A/B Testing Images
Don’t guess—test.
- Hero Variations: Try two different hero images and see which one leads to more clicks.
- Product Styles: Test a clean product shot against a lifestyle shot to see which drives more sales.
- Placement: Try moving images to the left or right of the text.
Tools for Analysis
- Google PageSpeed Insights: Gives you a score and specific recommendations for improvement.
- GTmetrix: Detailed analysis of your site’s speed and performance.
- Wix Analytics: built-in insights on traffic and behavior.
- Heatmaps: Tools like Hotjar show you exactly where users are looking and clicking on your page.
Part 8: Quick Wins You Can Do Today
You don’t have to overhaul your entire site overnight. Start with these quick actions.
Immediate Actions (30 Minutes)
- Compress: Run your most important images through a compression tool like TinyPNG.
- Alt Text: Add descriptive text to your images. This helps with accessibility and improves your SEO.
- Audit: Scan your site for any obviously blurry or broken images and remove them.
This Week
- Homepage Refresh: Look at your homepage hero image. Is it the best it can be? If not, swap it out.
- Get Real: Replace at least one generic stock photo with a real photo of your team or product.
- Backgrounds: Use an AI background remover to clean up your top-selling product photos.
This Month
- Style Guide: Decide on a consistent look for your photos (lighting, colors, filters) so your brand looks cohesive.
- Invest: Consider hiring a pro photographer for a day to get a library of high-quality assets.
- Organize: Clean up your media library so you can easily find the right image when you need it.
Conclusion
Your website images are silent salespeople. They work 24/7 to welcome visitors, explain your products, and build trust. When you get them right, they can dramatically improve your results.
It is not about being perfect instantly. It is about balance. You want photos that look crisp and professional but don’t weigh your site down. Thanks to modern formats, compression tools, and AI helpers, achieving that balance is easier than ever.
Start small. Compress the images on your top 10 most popular pages today. You might be surprised at how much a few kilobytes can change your business.