Bridging 3D Graphics and Video Editing for Mind-Blowing Visuals
Creating video content that actually grabs attention means moving past basic transitions and stock filters. The most engaging videos right now—whether they are high-end commercial specs, indie game trailers, or cinematic YouTube essays—almost always blend 3D elements directly into real-world footage.
If you have ever tried to jump from a flat video editor into a full 3D viewport, you know the learning curve feels less like a slope and more like a brick wall. But mastering this hybrid pipeline completely changes what you are capable of creating.
To help you get started without spending thousands on premium templates, you can explore assets for a free download GFX content strategy to elevate your raw timelines.
Leveraging platforms like gfx-hub.co gives you immediate access to complex 3D tracking assets, overlays, and plugins that bridge the gap between flat footage and deep space.
Why Flat Video Editing Isn’t Enough Anymore
Audiences are highly attuned to visual depth. A decade ago, a clean text pop-up with a nice drop shadow looked professional. Today, viewers expect typography to interact with the environment, shadows to cast naturally across real objects, and camera movements to feel completely unified across live-action and digital assets.
When you limit yourself strictly to traditional non-linear video editing software, you are stuck in a two-dimensional plane. You can scale elements, rotate them on a flat canvas, and adjust their opacity. But you cannot easily change the light source on a product, wrap text realistically around a curved physical object, or simulate true focal depth.
Integrating a 3D application into your workflow lets you break out of those constraints. Instead of treating text or graphics as an overlay slapped on top of your video, you treat your video as an environment where digital objects truly exist.
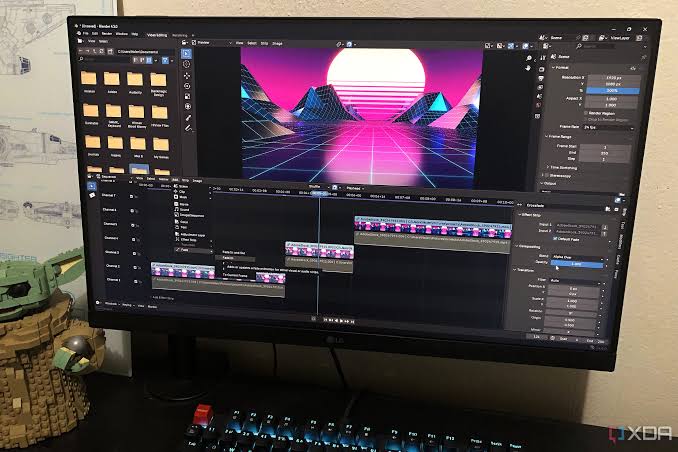
Choosing Your Toolkit: Blender Meets Your Editor
For most creators, the ideal pipeline pairs an accessible, industry-standard video editor with a robust 3D suite.
- The 3D Engine (Blender): It is completely free, open-source, and matches or beats commercial software for most independent workflows. Blender handles modeling, texturing, lighting, animation, and critical tasks like VFX camera tracking.
- The Video Editor (Premiere Pro, DaVinci Resolve, or Final Cut): While Blender has a built-in video sequencer, dedicated editors excel at rapid pacing, multi-track audio design, color grading, and handling heavy raw camera codecs.
The magic happens when you sync these two spaces. You do not build everything from scratch in 3D; you track your real-world camera motion, export that data, drop your 3D creations into that virtual space, render them out, and composite them back over your original edit.
The Step-by-Step Hybrid Workflow
To successfully mix these two disciplines without destroying your computer’s render queue or scrambling your file management, follow this strict operational order.
1.Lock the Edit First :Prerequisite.
Never try to add complex 3D graphics to a changing timeline. Edit your raw footage, choose the exact clips you want to enhance, and trim them down to the precise frame count.
2.Solve the Camera Track :Blender Viewport.
Import your target clip into Blender’s VFX workspace. Place tracking markers on high-contrast points that stay visible throughout the shot. Let the solver calculate the focal length and motion path of your physical camera.
3.Match Environment and Lighting :3D Setup.
Set up rough geometry to act as floors or walls where your digital objects will sit. Use an HDRI (High Dynamic Range Image) captured from a similar environment to instantly match the light directions and reflections of your real scene.
4.Render with Transparency :Export Settings.
Render your 3D objects using an image sequence format (like OpenEXR or transparent PNGs). Make sure you check the “Transparent” box under the Film settings so your 3D assets don’t render with a solid black background.
5.Composite and Grade :Video Timeline.
Drop your transparent 3D render sequence directly over your original footage inside your video editor. Apply a matching color grade, add artificial digital lens grain, and use motion blur to lock the elements completely together.
Mastering the Illusion: Lighting and Camera Tracking
The two elements that instantly ruin a mixed-media edit are bad lighting orientation and sliding objects. If your 3D object floats or slides across a table instead of sticking to it, the viewer’s brain instantly registers the fake element.
The Camera Solve Error
When tracking a camera path in Blender, keep an eye on your Solve Error metric. This number tells you how closely the software’s math matches your real lens.
- An error above 1.0 pixel means your objects will visibly drift and wiggle.
- An error below 0.5 pixels is the gold standard, ensuring your 3D objects look bolted to the floor.
Catching the Light
Even a perfectly tracked object looks fake if the shadows don’t make sense. If your real video clip was shot under cloudy, diffused daylight, your 3D models should not have harsh, sharp-edged shadows cast by a tiny direct point light. Use soft, large area lights in your 3D viewport to mimic the real world ambient environment perfectly.
Keeping Performance Smooth: Proxy Workflows
Working across both video timelines and 3D scenes demands massive hardware power. If your playback drops to 4 frames per second, your creative momentum dies.
To keep your machine responsive, rely heavily on proxies—low-resolution copies of your heavy camera footage. Use these lightweight files to handle your editing and initial 3D tracking layouts. Once your animation looks perfect and you are ready for final rendering, flip the toggle back to your high-resolution original footage. This saves hours of processing lag and keeps your graphics card from choking mid-project.
Experimenting with different styles and combining pre-made assets with custom texturing can rapidly speed up your learning curve. Keep practicing, track carefully, and build a library of trusted tools to make your creative visions happen.