Parting Off Lathe: A Practical, No-Nonsense Guide for Clean, Accurate Cuts
If you’ve spent any time around a lathe, you already know that parting off lathe operations can feel deceptively simple—and then suddenly go sideways. One moment everything is smooth, the next you’re dealing with chatter, tool breakage, or a rough cutoff that makes you question your setup.
I’ve been there. Every machinist has.
This guide breaks down parting off lathe techniques in a way that actually reflects real shop experience—not textbook theory. Whether you’re working on a manual setup or CNC, you’ll learn how to get cleaner cuts, extend tool life, and avoid those frustrating failures that eat up time and material.
What Is Parting Off on a Lathe?
The Basic Concept
At its core, parting off lathe work is the process of cutting a finished part away from the remaining stock. You’re essentially slicing through the material using a narrow tool, usually perpendicular to the workpiece.
Sounds simple, right? In practice, it’s one of the most sensitive operations on a lathe.
Unlike turning or facing, where forces are distributed more evenly, parting off concentrates stress in a very small cutting area. That’s why even minor mistakes in setup can lead to chatter or tool failure.
Why It’s Trickier Than It Looks
Here’s the thing most beginners don’t realize: during a parting off lathe operation, everything is working against you.
The tool is narrow, which makes it less rigid
The chip has nowhere to go
Heat builds up quickly
Any misalignment gets amplified
That combination is why parting off is often the “make or break” moment in a machining process.
Essential Tools for Parting Off Lathe Operations
Choosing the Right Parting Tool
Not all parting tools are created equal. The right choice depends on your material, machine rigidity, and the size of the workpiece.
For most parting off lathe jobs, you’ll see three common options:
Blade-style tools that offer flexibility but require careful setup
Insert-based tools that provide consistency and easier replacement
Solid HSS tools, which are still popular for smaller or manual lathes
If you’re just starting out, insert tools tend to be more forgiving and consistent.
Tool Geometry Matters More Than You Think
A small tweak in geometry can completely change your results.
For smoother parting off lathe cuts, pay attention to:
Rake angle, which affects chip flow
Clearance angle, which prevents rubbing
Tool width, which impacts cutting force
A wider tool is stronger but creates more resistance. A thinner tool reduces force but increases the risk of deflection. It’s always a balancing act.
Setting Up for a Perfect Parting Cut
Getting a clean result in any parting off lathe operation starts long before the tool touches the material. Setup is where most successes—and failures—are decided. You can have a sharp tool and decent speeds, but if your setup is off, the cut will fight you the entire way. The goal here is simple: maximize rigidity, eliminate unnecessary movement, and give the tool the best possible chance to cut smoothly instead of struggling.
Center Height Is Non-Negotiable
If there’s one detail you absolutely cannot “eyeball” in a parting off lathe setup, it’s center height. The cutting edge must sit exactly on the spindle centerline. Even a slight deviation changes how the tool engages with the material.
Set the tool too high, and it starts rubbing instead of cutting, which quickly builds heat and ruins surface finish. Set it too low, and the tool tends to dig in, increasing the risk of chatter or sudden tool failure. Neither scenario ends well.
A practical approach is to align the tip of your parting tool with a known center reference, such as a tailstock point. It’s quick, reliable, and removes guesswork. Once you get this right, you’ll notice your parting off lathe cuts become more predictable almost immediately.
Minimize Overhang
Rigidity is everything in parting off lathe work, and overhang is its biggest enemy. The farther your tool extends from the holder, the more leverage vibration has to build up.
Keep the tool projection as short as possible while still reaching the cut. This small adjustment dramatically reduces chatter and improves stability. It also allows you to maintain a more consistent feed rate without hesitation.
Many machining issues blamed on speed or tooling actually come down to excessive overhang. Tighten that up, and a lot of problems simply disappear.
Lock Everything Down
Before starting any parting off lathe operation, take a moment to secure every movable component. Even minor looseness can translate into visible defects during the cut.
Make sure the tool holder is firmly clamped and seated properly. If your machine allows it, lock the carriage or cross slide to eliminate unintended movement. The compound rest should also be tightened to prevent micro-shifts under cutting pressure.
This step may feel routine, but it’s often overlooked. A solid, locked setup gives you the stability needed for a smooth, controlled parting off lathe cut—and that’s what separates a clean finish from a frustrating one.
Speed, Feed, and Cutting Strategy
Finding the Right Speed
Here’s where experience really comes into play.
For parting off lathe work, slower spindle speeds are usually safer. High speed increases heat and vibration, especially with tougher materials.
If you’re unsure, start conservative and adjust based on chip formation.
Feed Rate: Commit or Regret It
One of the biggest mistakes beginners make is feeding too slowly.
It feels safer, but it actually causes rubbing, which leads to heat and chatter. A confident, steady feed is essential for a clean parting off lathe cut.
Think of it this way: the tool wants to cut, not scrape.
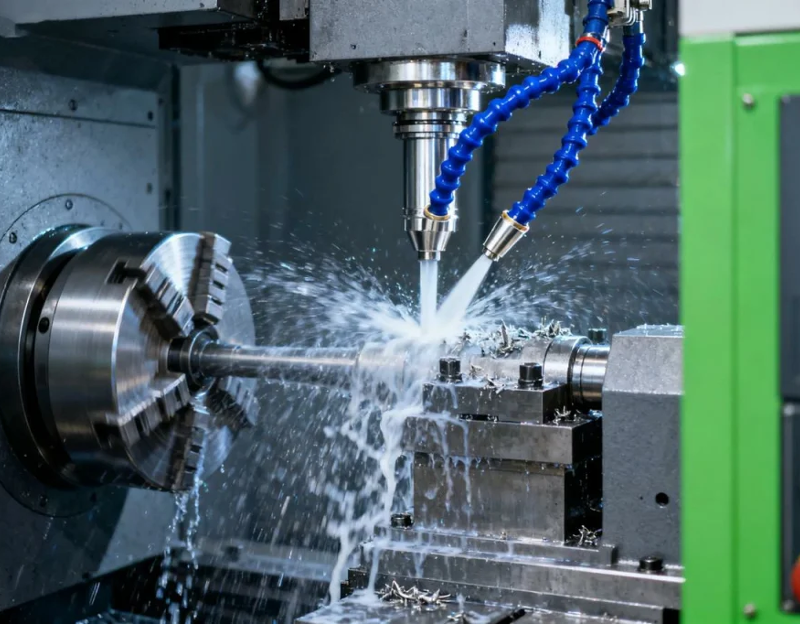
Use Coolant Generously
Heat is your enemy during parting.
Coolant helps by:
Reducing friction
Flushing chips out of the groove
Extending tool life
In many cases, proper coolant application is the difference between a smooth cutoff and a snapped tool.
Common Problems and How to Fix Them
Chatter and Vibration
Chatter is probably the most common issue in parting off lathe operations.
To fix it:
Reduce tool overhang
Lower spindle speed
Increase feed slightly
Check tool sharpness
Sometimes, even a small adjustment can eliminate vibration entirely.
Tool Breakage
A broken parting tool is frustrating—and often avoidable.
Common causes include:
Incorrect center height
Feeding too aggressively
Poor chip evacuation
If your parting off lathe tool keeps breaking, step back and review your setup. The issue is usually mechanical, not material-related.
Rough or Tapered Cuts
If your cutoff face isn’t clean or square, you’re likely dealing with alignment issues.
Double-check:
Tool perpendicularity to the workpiece
Rigidity of your setup
Wear on the cutting edge
Precision in parting off lathe work always starts with alignment.
Advanced Tips for Better Parting Results
Groove Before Parting
For tougher materials, pre-cutting a shallow groove can stabilize the tool and reduce cutting forces.
This technique makes parting off lathe operations much more predictable, especially on larger diameters.
Use Pecking When Needed
In deeper cuts, consider a pecking motion.
Advance slightly, retract to clear chips, then continue.
It’s slower, but it prevents chip buildup and tool binding—two major risks in parting off lathe work.
Upgrade Your Tooling When It Matters
Sometimes the problem isn’t your technique—it’s your tooling.
Higher-quality inserts with better coatings can significantly improve performance, especially when working with stainless steel or harder alloys.
Manual vs CNC Parting Off Lathe Techniques
Manual Lathe Approach
On a manual machine, you rely heavily on feel.
You’ll hear the cut, feel the vibration, and adjust in real time. Mastering parting off lathe manually builds instincts that translate to every other machining operation.
CNC Lathe Precision
CNC machines take the guesswork out of consistency.
With proper programming, parting off lathe operations can be repeated with incredible accuracy. However, the fundamentals—rigidity, alignment, and chip control—still apply.
Bad setup on a CNC will fail just as quickly as on a manual lathe.
Real-World Example: What Changed Everything for Me
I remember struggling with parting off lathe cuts early in my career. Tools kept chattering, finishes were rough, and I was burning through inserts faster than I’d like to admit.
The turning point wasn’t some fancy tool—it was fixing the basics.
I shortened the tool overhang
Slowed down the spindle
Committed to a steady feed
Suddenly, everything clicked. Clean cuts, minimal vibration, and tools lasting much longer.
It’s a reminder that in machining, fundamentals always win.
Learn More About Parting Off Lathe Techniques
If you want a deeper breakdown with step-by-step visuals and additional insights, check out this detailed guide on parting off lathe.
It complements what we’ve covered here and dives even further into practical applications.
Final Thoughts: Mastering Parting Off Lathe Work
At the end of the day, parting off lathe operations come down to control.
Control of your setup
Control of your cutting parameters
Control of your expectations
It’s not the flashiest part of machining, but it’s one of the most important. A clean cutoff isn’t just about aesthetics—it’s about precision, efficiency, and confidence in your process.
Stick to the fundamentals, stay patient, and don’t be afraid to make small adjustments. Over time, what once felt like a tricky operation becomes second nature.
And when that tool slices cleanly through the material with no chatter, no drama—you’ll know you’ve got it dialed in.